

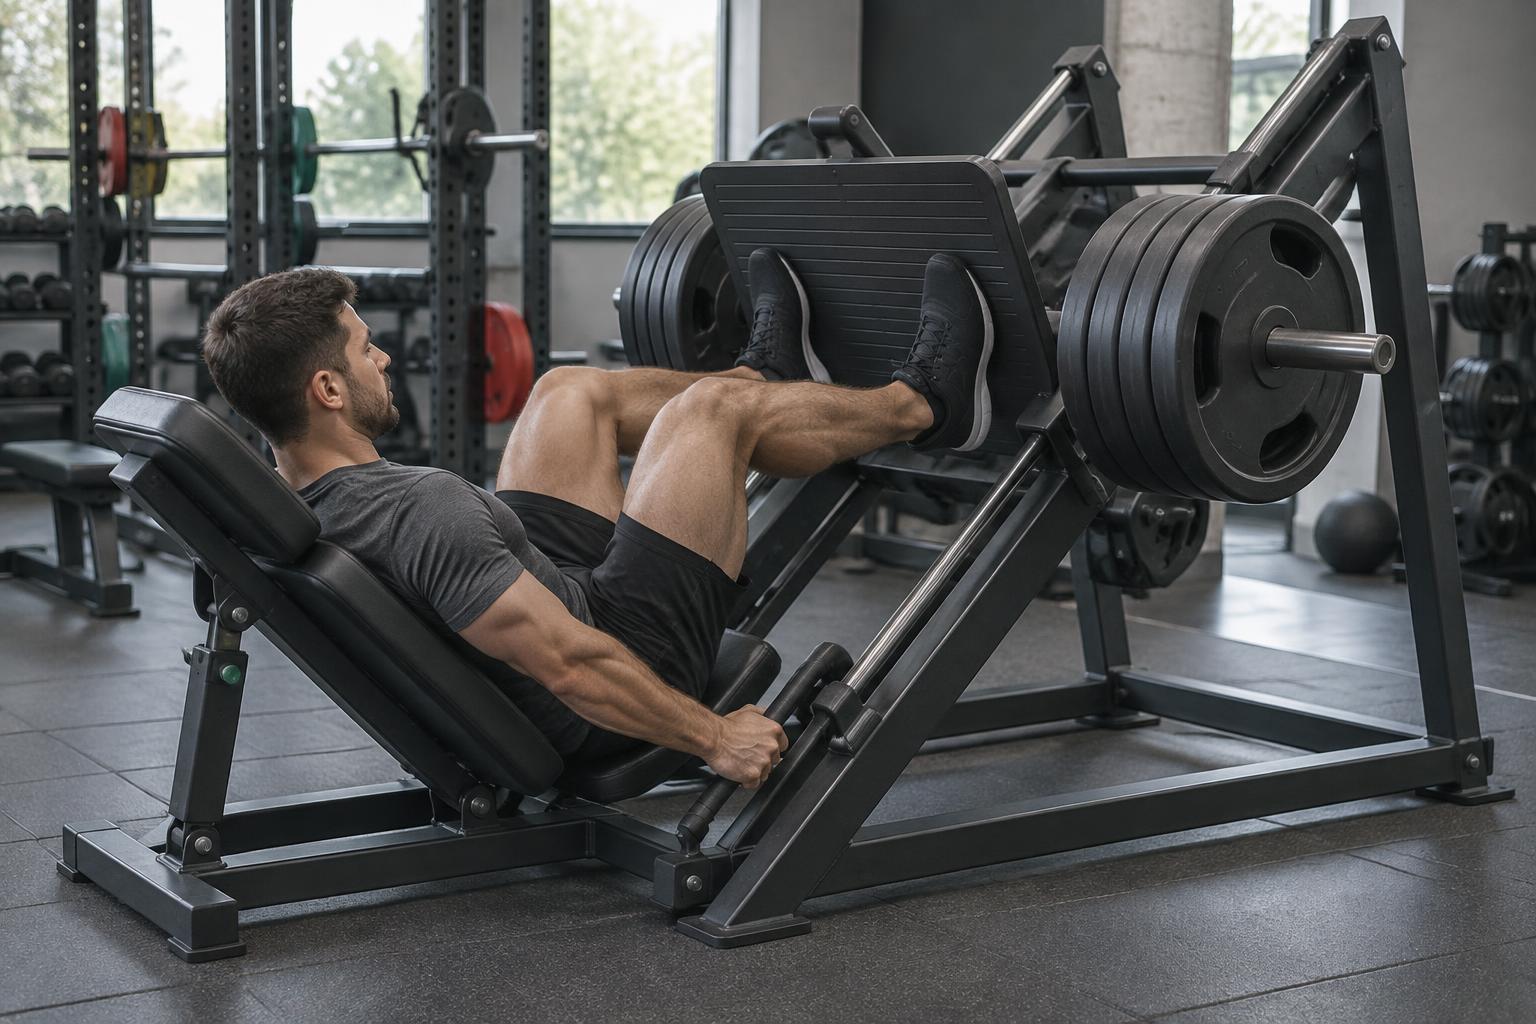
The leg press lets you load your legs with serious weight along a fixed, supported path: no bar resting across your spine, no balance requirement, and no spotter needed. That combination makes it one of the most effective lower-body machines in any gym, and one of the most commonly misused. The difference between a great leg press and a lower-back-wrecking session usually comes down to three things: depth, knee tracking, and foot placement.
Because the machine removes balance from the equation, it’s tempting to load it up and grind through reps that would never survive on a squat rack. That’s exactly where things go wrong. This guide expands the leg press section of our Complete Guide to Resistance Training Machines into a full standalone guide: how the machine works, how to set it up, exactly how foot placement changes what you train, and how to load it up safely for years of progress.
The Leg Press in Brief
Short on time? Here’s the whole article in six lines.
- Keep your hips and back glued to the pad through the entire rep. The moment they lift, that’s your true depth limit for that load.
- Start with a middle, shoulder-width foot placement. Adjust from there once you understand what each change does.
- Track your knees in line with your toes, never letting them collapse inward.
- Set the safety stops before your first rep, every single session.
- Lower for 2 to 3 seconds, drive up smoothly, stopping just short of locking your knees.
- Add weight only when every set stays pain-free and glued to the pad at the top of your rep range.

What Is the Leg Press Machine, and How Does It Work?
A leg press machine supports your back and hips while you push a weighted platform away from your body with your legs. Because your torso is braced against a pad rather than balancing over your feet, the machine removes the coordination and stabilization demands of a squat and lets your legs handle the resistance directly.
Three main versions show up across gyms.
The 45-degree sled leg press
The most common design in most commercial gyms. You sit reclined and push a sled loaded with plates up an inclined track. Because the sled itself is heavy before you add a single plate, and because the angled track changes how much of that weight you actually feel, “empty” is never truly zero. Start lighter than you think, especially the first time you use a specific machine.
The horizontal (seated) leg press
You sit upright with your legs extended in front of you, pushing a platform that travels along a horizontal or near-horizontal path. Many of these are selectorized, meaning you choose the load with a pin rather than loading plates.
The vertical leg press
Less common, but found in some gyms. You lie on your back underneath the platform and press it straight up above you. The movement pattern is close to the 45-degree version, just rotated so gravity pulls straight down on the platform instead of along an angled track.
Whichever version you use, the form principles below apply the same way. Where the versions matter most is in how the safety stops work, so learn your specific machine’s mechanism before you load it heavily.

How the safety stops work
Most leg press machines have a lever, hook, or pin you rotate or pull to lock the sled or platform at a set position, usually near the bottom of your range. Engage them before your first rep of every session, and only disengage them once you’re braced and ready to press. If a rep ever gets away from you, the stops catch the weight instead of your knees or lower back. Learn where your machine’s stops are and how they engage before you add serious load, and ask a staff member to walk you through it if the mechanism isn’t obvious.
Muscles Worked
- Quadriceps: the primary mover, especially with a lower foot placement. All four muscles of the quad group extend your knee as you drive the platform away.
- Glutes: heavily involved, especially with a higher or wider foot placement and a deeper range of motion, since the glutes drive hip extension.
- Hamstrings: assist in hip extension alongside the glutes and help control your descent, since they cross both the hip and the knee.
- Adductors: the inner-thigh muscles stabilize your femur (thigh bone) throughout the movement, becoming more active with a wider stance.
- Core and hips: work isometrically, meaning they contract without visibly moving, to keep your pelvis and lower back fixed against the pad. This is the group that fails first when the load gets too heavy, which is exactly why lower-back and hip position matter so much on this machine.
Small shifts in where you place your feet change the angle at which force travels through your hips and knees, which is why the same machine can be tuned to emphasize quads, glutes, or adductors. The foot placement section further down covers exactly how.
Leg Press vs. Squat
Both train your legs through a similar range of motion, but they ask different things of your body.
- Stabilization demand: a squat asks you to balance a bar, or your own bodyweight, over your feet through the whole movement, bracing your core and upper back the entire time. The leg press removes that job, supporting your torso so your legs can work without also having to hold you up.
- Muscle activation: with a similar depth and foot placement, the two exercises train your quads, glutes, and hamstrings in largely overlapping ways. The squat adds meaningfully more demand on your core, upper back, and grip, simply because you’re holding and balancing a load rather than pressing against a supported platform.
- Carryover: if squat strength itself matters to you, for a sport, a class, or a personal goal, you need to practice the squat. Leg press strength builds real muscle and general lower-body strength, but it won’t automatically translate into a bigger squat number, since balancing the bar is part of what’s being tested.
- Fatigue and recovery: because a squat recruits so much stabilizing muscle across your whole body, it tends to create more overall fatigue per working set. The leg press lets you push your legs hard, sometimes closer to failure, with less systemic cost and no spotter required.
Neither exercise replaces the other. Many well-built lifters use squats as their main strength movement and the leg press as a way to add extra, lower-fatigue volume for the same muscles.
Disclosure: This article includes Amazon affiliate links. If you buy through them, we may earn a commission at no extra cost to you.
Where the Leg Press Fits in Your Workout
If your session includes a free-weight lower-body exercise like a squat or a lunge, a common approach is to do that exercise first, while you’re freshest and your stabilizers are least fatigued, then use the leg press afterward to add volume without the same balance demands. If the leg press is your only lower-body exercise for the day, doing it early lets you use slightly more weight while your form is sharpest.
Pair it with a hip-hinge movement over the course of your week, such as a hamstring curl or a Romanian deadlift variation. The leg press emphasizes knee-dominant force production; a hinge movement balances that out with more direct hamstring and glute work through hip extension. If you train at home, a pair of adjustable dumbbells can help you add that hinge movement without another large machine.
Setup: The Non-Negotiables
These three checks matter more on the leg press than on almost any other machine, because getting them wrong shows up as lower-back stress rather than just a wasted set. For the complete machine-fitting process, see the machine setup guide.
- Hips and back fully on the pad. Before any rep, confirm your sacrum (the flat, triangular bone at the base of your spine) and your entire back are pressed into the back pad. This is your reference position, and it must never change during the set.
- Safety stops set before the first set. Rack the weight into the stops at the end of every set. Never trust your legs to catch a failed rep at the bottom position.
- Start position. Un-rack until your legs are nearly extended with a soft bend in the knees. Never slam into a full, hard lockout.
Proper Form, Step by Step
- Foot position. Place your feet roughly shoulder-width apart on the platform, toes pointed out about 10 to 20 degrees. Shoes with a stable, grippy sole can make it easier to keep full-foot contact; browse flat-soled training shoes if your current pair feels unstable. The full foot placement guide below covers how to adjust this deliberately.
- Un-rack and set. Extend your legs without locking them, take a breath, and lightly brace your midsection.
- Lower with control. Take 2 to 3 seconds to descend, inhaling as you go. Your knees should track in line with your toes at every point in the range, never collapsing inward.
- Find your depth. Lower until your thighs are roughly parallel to the platform, while your pelvis and lower back stay fully on the pad. The moment your hips start to tuck or your lower back peels away from the pad, that’s your real depth limit for that load. Forced extra depth beyond that point is just your lower back flexing under load, not extra range earned by your hips.
- Drive up. Push through your whole foot, spreading force through your heel and the mound below your big toe, while exhaling. Keep your knees tracking over your toes the entire way. No bouncing at the bottom; the direction change from lowering to pressing should be smooth and controlled.
Breathing and tempo, in short: inhale on the descent, exhale on the drive up. About 1 to 2 seconds to press, and 2 to 3 seconds to lower.

Foot Placement: The Complete Guide
Foot placement is the steering wheel of the leg press. Small changes shift emphasis between your quads, glutes, and adductors without changing anything else about the exercise.
Height on the platform
| Placement | Emphasis | Notes |
|---|---|---|
| Lower (near the bottom edge) | More quadriceps | Knees travel further forward over the toes. Demands good ankle mobility, and can mean more knee stress for some lifters. |
| Middle (standard) | Balanced quads and glutes | The default for most people, and the best starting point if you’re not sure. |
| Higher (near the top edge) | More glutes and hamstrings | Reduces knee travel and increases hip-extension demand. Watch for the pelvis tucking if you also go very deep. |
Width and toe angle
- Narrow stance: more quad emphasis, with more knee-forward travel. Consider avoiding this if you already have knee discomfort.
- Wide stance with toes turned out: more adductor and inner-thigh involvement, and generally easier on the knees. A solid choice for many lifters.
- Standard, shoulder-width: the best default for balanced development across the whole lower body.
The calf raise trick (use sparingly)
Some lifters use a very low foot placement with their heels hanging off the bottom edge of the platform to turn the leg press into a calf raise. It works, but it loads your Achilles tendon and plantar fascia in a stretched position under real weight. Keep the load modest and the range controlled if you try it, and stop if you feel any strain in the back of your ankle.
The Six Mistakes That Ruin the Leg Press
- Lower back and hips lifting off the pad. This is the cardinal sin of the leg press. The moment your pelvis tucks under at the bottom, sometimes called a “butt wink” under load, your lumbar spine takes on force that your legs should be handling instead. Pain in the lower back during or after leg pressing almost always traces back to this. Fix: reduce your depth, your load, or both, until your back stays glued to the pad through the entire rep.
- Knees collapsing inward (valgus). Often a strength or control issue at the hips, and sometimes just a setup issue, like feet placed too narrow or too far down the platform. Fix: widen your stance slightly, point your toes out a little more, and focus on actively pushing your knees out during the drive. If it persists even under light loads, consider dedicated hip-strengthening work, or get it assessed by a professional.
- Partial reps with too much weight. Loading the sled with plates and moving it a few inches is mostly a demonstration of the machine’s friction, not a real leg workout. Fix: use a lighter load and move through your full, controlled range to your true depth limit.
- Bouncing out of the bottom. Dropping fast and reversing direction uses elastic energy and momentum instead of muscle, and spikes stress on your knees and lower back right at the turnaround point. Fix: a deliberate 2 to 3 second descent and a smooth, controlled direction change.
- Locking the knees at the top. A full lockout under heavy load transfers force straight into the knee joint, and can even cause a dangerous, uncontrolled “bounce” into hyperextension. Fix: stop just short of lockout, and keep tension on the muscle rather than the joint.
- Hands braced on the knees. Pushing your knees with your hands helps you move weight your legs genuinely can’t, and it’s a clear sign the load is too heavy. Your hands belong on the provided handles, every single rep.

Understanding “Butt Wink”: Why Depth Matters More Than Range
Every hip has a personal limit to how far it can flex before something else has to give. As you approach that limit on the leg press, with your knees traveling close to your chest, your pelvis can start to rotate backward to squeeze out a little more range. That rotation pulls your lower back away from the pad and rounds your spine, right at the exact moment it’s under the most load in the set. That’s what people mean by a “butt wink,” and under real weight it’s a meaningfully different situation than the same thing happening during a bodyweight mobility drill.
This is also why there’s no single universal depth target, like “thighs at parallel,” that works for everyone. Hip anatomy, femur length, and hip mobility vary a lot from person to person, so two lifters using identical form can have very different depth limits. The real target isn’t a specific angle; it’s the deepest position you can reach while your pelvis and lower back stay flat against the pad. Find that position, treat it as your working depth, and revisit it occasionally as your mobility improves with consistent training.
Leg Press Rep Ranges for Different Goals
| Goal | Rep range | Effort target |
|---|---|---|
| Strength | 5 to 8 reps | Heavier load, 1 to 2 reps in reserve, longer rests (2 to 3 minutes) |
| Muscle growth | 8 to 12 reps | Moderate load, 1 to 2 reps in reserve, 60 to 90 second rests |
| Muscular endurance | 15 to 20 reps | Lighter load, 2 to 3 reps in reserve, shorter rests |
Most beginners and general fitness goals are well served by the 8 to 12 rep range. Full detail on choosing and adjusting rep ranges lives in the reps and sets guide.
How to Progress
The leg press responds well to slow, patient overload rather than aggressive jumps in weight.
- Effort target: most working sets should end with 1 to 2 good reps in reserve. Leg pressing to absolute failure on a regular basis is hard to recover from, so save true failure for occasional final sets rather than making it the default.
- The overload rule: when you complete the top of your target rep range on every set with perfect back-and-pad contact, add the smallest available plate next session. The full progression toolkit, including rep and range progression, is in the progressive overload guide.
- Deloads: every 6 to 12 weeks, cut your volume or load by roughly half for a week. Heavy leg pressing accumulates fatigue quickly, and a deload keeps your knees and lower back fresh. The nutrition and recovery guide covers what else supports recovery between sessions.
Sample Progression Snapshot
Here’s what steady double progression can look like over nine weeks. Weights are illustrative; use whatever increments your own machine actually offers.
| Week | Weight | Sets x Reps | Note |
|---|---|---|---|
| 1 | 80 kg | 3 x 10 | Rehearsal-light, learning depth and foot placement |
| 3 | 90 kg | 3 x 10 | Small jump, same reps |
| 5 | 90 kg | 3 x 12 | Reps increased before load |
| 6 | 100 kg | 3 x 10 | New load, reps reset |
| 9 | 100 kg | 4 x 10 | Added a set, another form of overload |
Sample Placement Experiment
If you want to feel the difference foot placement makes for yourself, try this simple experiment over one week and three sessions, using a light, controlled weight throughout.
| Session | Placement | Focus |
|---|---|---|
| 1 | Middle, shoulder-width | Baseline: a balanced pattern |
| 2 | Higher, slightly wider | Feel the glutes and hamstrings take over more |
| 3 | Middle, toes out 15 degrees | Feel the adductors work, and note your knee comfort |
Log how each session feels, then build your default placement around whichever version lets you train hardest with zero joint complaints. A simple workout logbook can help you compare foot placement, load, reps, and comfort across sessions.
Discomfort vs. Pain: Know the Difference
A hard set of leg presses should feel like burning and fatigue across your thighs and glutes. That’s normal effort, and it fades within a minute or two of finishing the set. Sharp or pinching pain in a joint, especially the knee or lower back, or any pain that lingers well after the set ends, is a different signal. It means something in your depth, foot placement, or load needs to change.
If you feel joint pain, stop the set, reduce your depth, and lower the load. If pain continues across sessions, have it assessed by a qualified professional before you keep training through it.
Frequently Asked Questions
Is the leg press safe?
Used correctly, with your back and hips glued to the pad, controlled depth, and weight you can genuinely handle for full, clean reps, the leg press is one of the safer ways to load your legs heavily. Most of the risk associated with the machine comes from a specific, avoidable pattern: loading it with far more weight than can be controlled and letting the lower back round to compensate. Respect the setup non-negotiables above and that risk drops sharply.
How deep should I go on the leg press?
As deep as you can while your pelvis and lower back stay fully in contact with the pad, and not a fraction deeper. That depth is different for every lifter, since it depends on your individual hip mobility, so don’t chase someone else’s range of motion.
Is the leg press a good replacement for squats?
It’s an excellent complement, but not a full replacement if squat strength itself matters to you. The leg press builds real quad, glute, and hamstring size and strength, and it can be loaded heavily with less systemic fatigue than a squat. A squat still uniquely trains the balance, bracing, and full-body coordination that carries over to squatting itself.
Why do my knees hurt on the leg press?
Check foot placement first: a stance that’s too narrow or too low on the platform increases forward knee travel, which can aggravate sensitive knees. Also check that your knees are tracking in line with your toes rather than collapsing inward, and that you aren’t locking out hard at the top of every rep. If discomfort continues after adjusting these, get it assessed by a professional.
Can I do a single-leg leg press?
Yes, on many machines. Working one leg at a time increases the stability demand slightly and helps address side-to-side strength differences. Use noticeably less weight than your two-leg working sets, since you’re asking one leg to do the job of two, and keep the same depth and knee-tracking standards.
How often can I train legs on the leg press each week?
Two sessions a week works well for most people, with at least 48 hours between them to recover. Because the leg press can be loaded heavily, it tends to create more soreness and fatigue than lighter accessory work, so give it real recovery time rather than training it on consecutive days.
What if my gym’s leg press platform doesn’t allow the foot placements described here?
Work within whatever range the platform allows, and treat the height and width guidance as a direction to lean toward rather than an exact position you must hit. Even a small shift toward “lower” or “higher” and “narrower” or “wider” changes emphasis the same way, just to a smaller degree.
The Takeaway
The leg press is simple to learn and brutally honest about your discipline. Keep your back on the pad, track your knees over your toes, place your feet with intention, control your range to your true depth, and never load more weight than your form can handle. Master those things and you have a lower-body builder that will serve you for years.
Return to the Complete Guide to Resistance Training Machines for the full cluster of technique, programming, and recovery articles.
This article is for general education and isn’t medical advice. If you have a health condition, an injury, or any doubt about whether resistance training is right for you, check with a doctor or qualified professional before you start.